Since the last blog post post we did some updates in our Jenkins environments and today I’m going to talk a bit about it. We are using a Gradle Jenkins plugin to control the Jenkins installation.
We already mentioned the DSL on the previous blogpost, you can find more information about the Job DSL Plugin
“Why did we change it?” you may ask. For the other plugin you need to create a seed job, and at ePages, we have quite a complex structure with a few shell scripts. Some of those shell scripts are shared on the company level, so before changing them, we want to make sure they work properly. (Testing phase!)
Another advantage of this plugin is that it is easy to deploy. For instance, I didn’t want to break our Team Jenkins installation, so I run an instance of Jenkins in a docker container and deploy my playground scripts to it.
How to set up the project
In your gradle project, you should use the gradle-jenkins-plugin.
Look at the following sample snippet:
buildscript {
  repositories {
    maven { url "https://plugins.gradle.org/m2/" }
    maven { url 'http://repo.jenkins-ci.org/releases/' }
    mavenLocal()
  }
  dependencies {
    classpath "com.terrafolio:gradle-jenkins-plugin:1.3.2"
  }
}

apply plugin: 'com.terrafolio.jenkins'

jenkins {

    servers {
        localhost_jenkins {
            url 'http://localhost:8080/' //change for your jenkins name
            secure true
            username 'admin' //change for your user name
            password 'admin' //change for your password
        }
    }

    defaultServer servers.localhost_jenkins

    dsl {
        job("SampleJob") {
            displayName 'My sample job'
            description ''
            logRotator {
                numToKeep(10)
            }
        }

    } // end dsl
}
Note: This will not setup a Jenkins for you! It will only authenticate with your own instance!
How to use the plugin
I was using my local Jenkins.
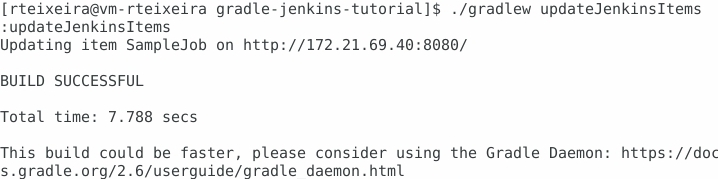
After doing the proper changes on the DSL, I just need to trigger the task updateJenkinsItems.
To use it, simply create a gradle project and copy the snippet. On the project folder you could use:
./gradlew tasksThis will provide you the list of available tasks.
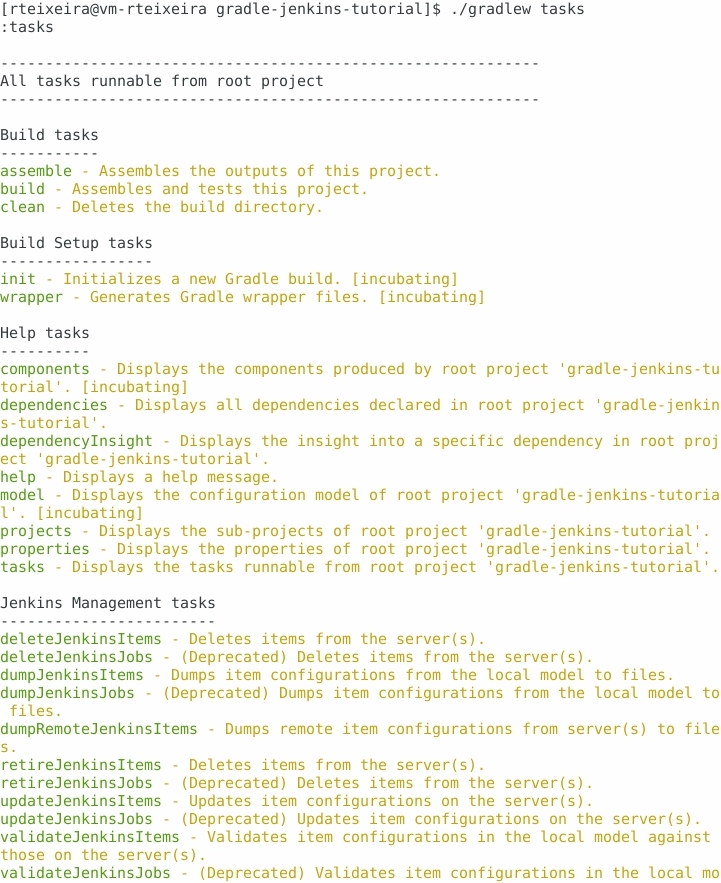
./gradlew validateJenkinsItemsThis will validate local changes with your Jenkins.
./gradlew updateJenkinsItemsThis will update your Jenkins installation with the DSL defined locally.
Conclusions
This plugin is really powerful, and there are many cases where you could use it to empower your jobs/automation environment. I hope this blog post illustrates the application examples of this plugin. If you want to know more about the other jobs, have a look at complete documentation on the project wiki.
Advantages
- We have our Jenkins jobs under a source control system (git).
- We can recreate our Jenkins instance pretty fast and test locally without effecting the rest of the team.
Disadvantages
- If you are not familiar with Gradle, it might take some time for you to become acquainted with the configuration.
Credits
We didn’t come up with a company-wide solution, but use the plugin in our team and adapt it to our needs. So a big thanks to Gary Hale, because without him I wouldn’t be writing about it today 😉.
References
- Gradle Jenkins plugin.
- If you want to create a local Jenkins, here is a small tutorial how to setup a docker instance.